Support
All features have default titles and descriptions to make the setup process simple. All these widget texts can be edited via the Text Overrides section.
Each widget has its own configurations, so you can configure each widget differently. If you want the same configurations for multiple widgets, make sure to update each widget in order to synchronize displays and behaviors.
All widgets can be modified from Tools
-
Go to Tools
-
Select the widget to modify
-
Click the Text override icon in the bottom-right menu
Overview
Button text for Support Channels
When the Raffle Search Assistant is active and Support Channel(s) are enabled, the user can enter the page of Support Channels via a button at the bottom of the search assistant. The text on this button can be changed to your preferences
-
Go to the Customer Support tab, in the Text Overrides section
-
Go to Overview
-
Click the Button text for support channels text field and enter a button label
-
Click Save Changes
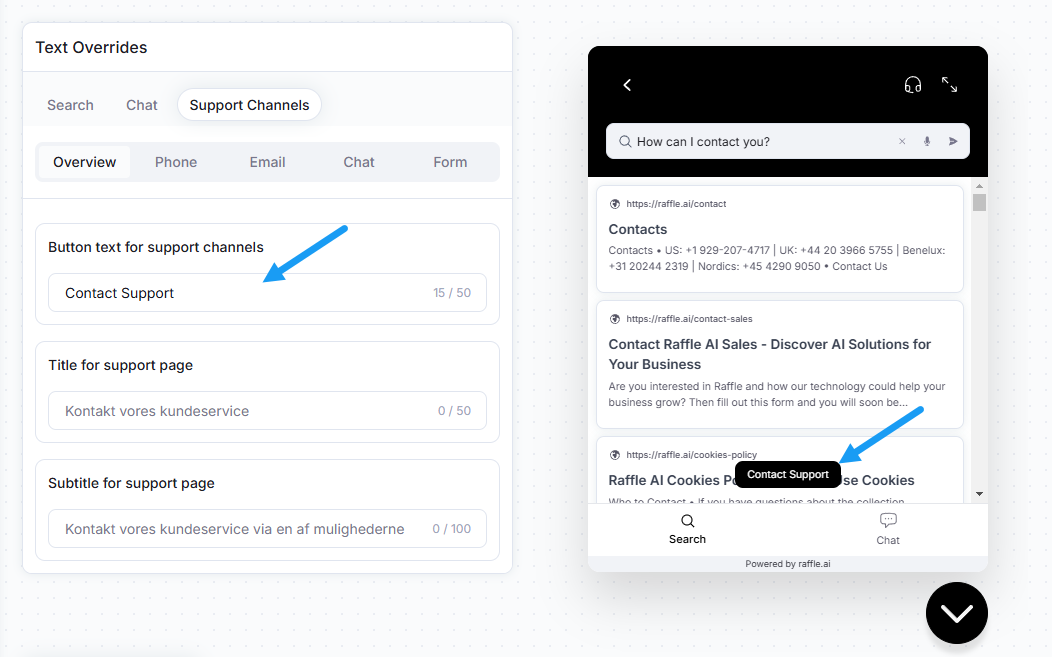
Button text for Support Channels and Preview
Support Page Title and Description
When the Raffle Search Assistant is active and Support Channels are enabled, the user can enter the page of Support Channel via a button at the bottom of the search assistant. The title and subtitle can be edited as a Text override
-
Go to the Customer Support tab, in the Text Overrides section
-
Go to Overview
-
Click the Title for support page text field and enter a heading
-
Click the Subtitle for support page text fields to enter a subtitle description.
-
Click Save Changes
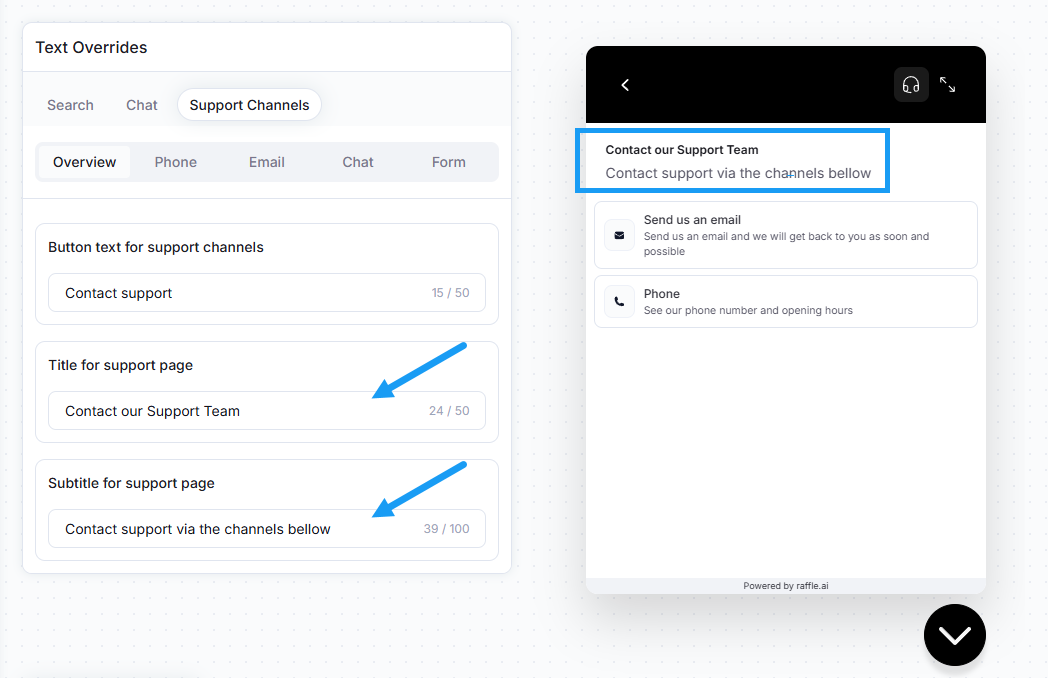
Support Page Title and Description with Preview
Phone
Phone Channel Element Name and Description
When multiple support channels are enabled and the user goes to the support menu, they can see the Phone option. The title and description of this element can be changed with a simple override
-
Go to the Customer Support tab, in the Text Overrides section
-
Go to Phone
-
Click the text fields of Channel name and enter your title label
-
Click the Channel description text fields to enter your description. The default informs that the phone number and opening hours can be found with a click
-
Click Save Changes
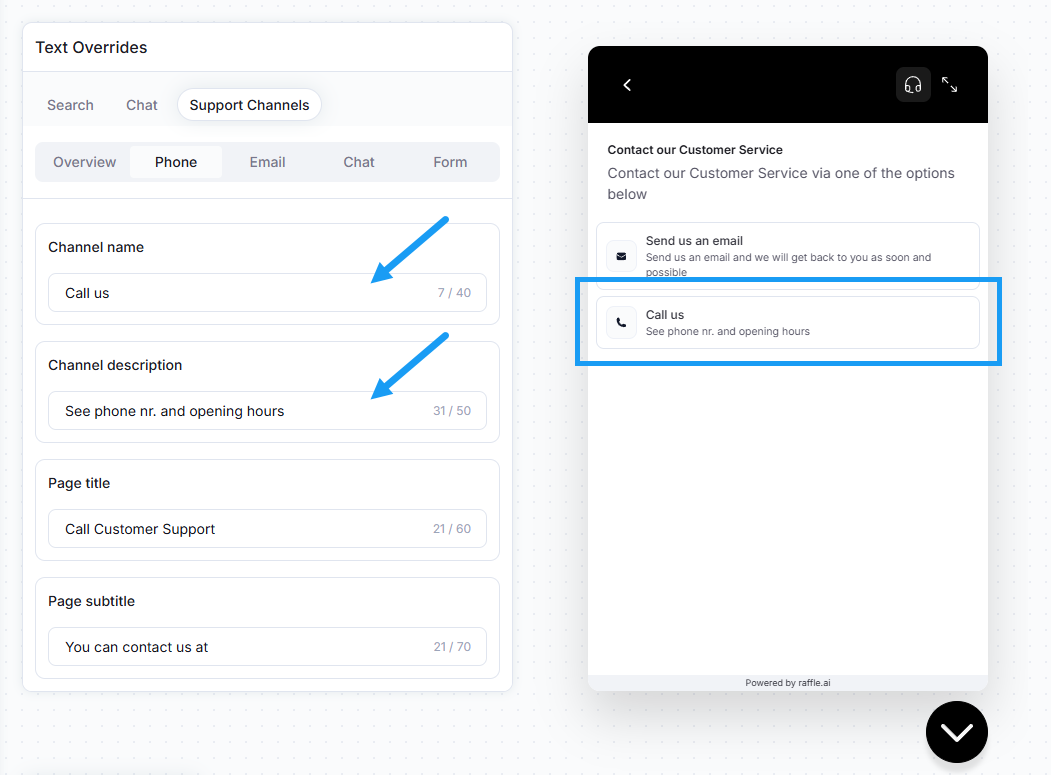
Phone Support Channel element and Preview
Phone Channel Page Name and Description
When multiple support channels are enables and the user goes to the support menu, they can see the Phone option. The title and description of this element can be changed with a simple override
-
Go to the Customer Support tab, in the Text Overrides section
-
Click the text fields of Channel name and enter your title label
-
Click the Channel description text fields to enter your description. The default informs that the phone number and opening hours can be found with a click
-
Click Save Changes
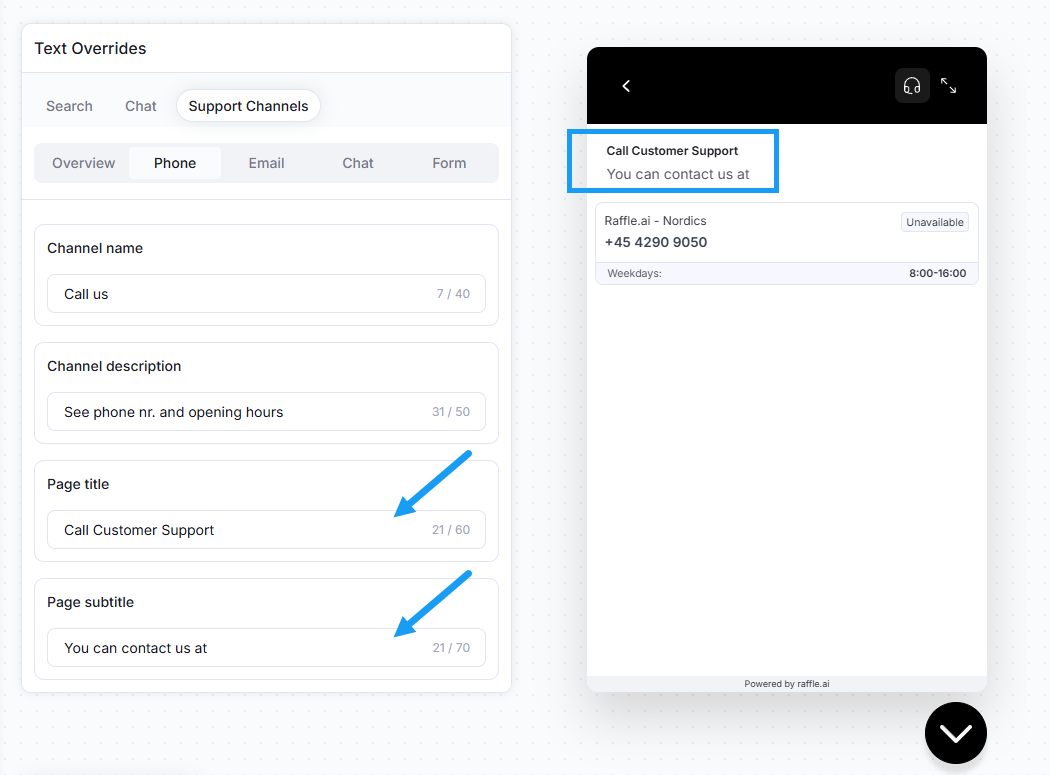
Phone Channel Page Name and Description with Preview
Emil
Email Channel Element Name and Description
When multiple support channels are enabled and the user goes to the support menu, they can see the Email option. The title and description of this element can be changed with a simple override
-
Go to the Customer Support tab, in the Text Overrides section
-
Go to Email
-
Click the text fields of Channel name and enter your title label
-
Click the Channel description text fields to enter your description
-
Click Save Changes
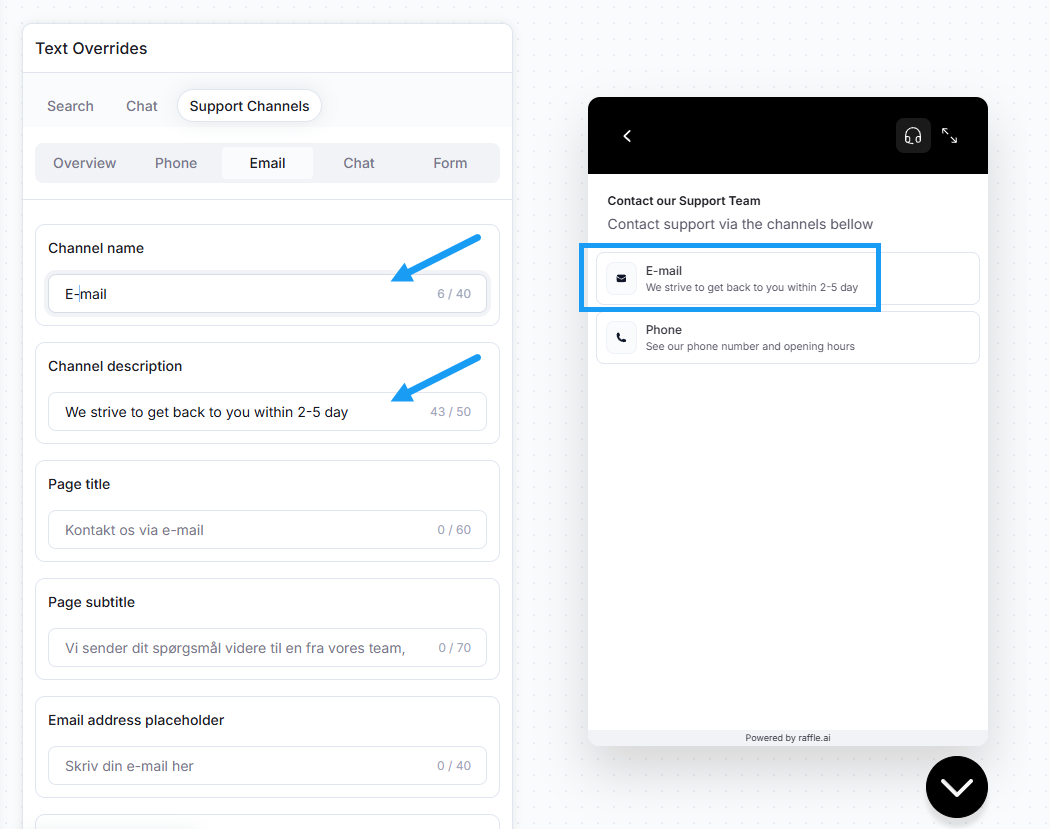
Email Channel Element Name and Description with Preview
E-mail Support Page Title and Subtitle
The title and description of the page that allows you to contact the Email support can be updated to fit the message you want to send
-
Go to the Customer Support tab, in the Text Overrides section
-
Go to Email
-
Click the text fields of Page title and enter your title label
-
Click the Page subtitle text fields to enter your description
-
Click Save Changes
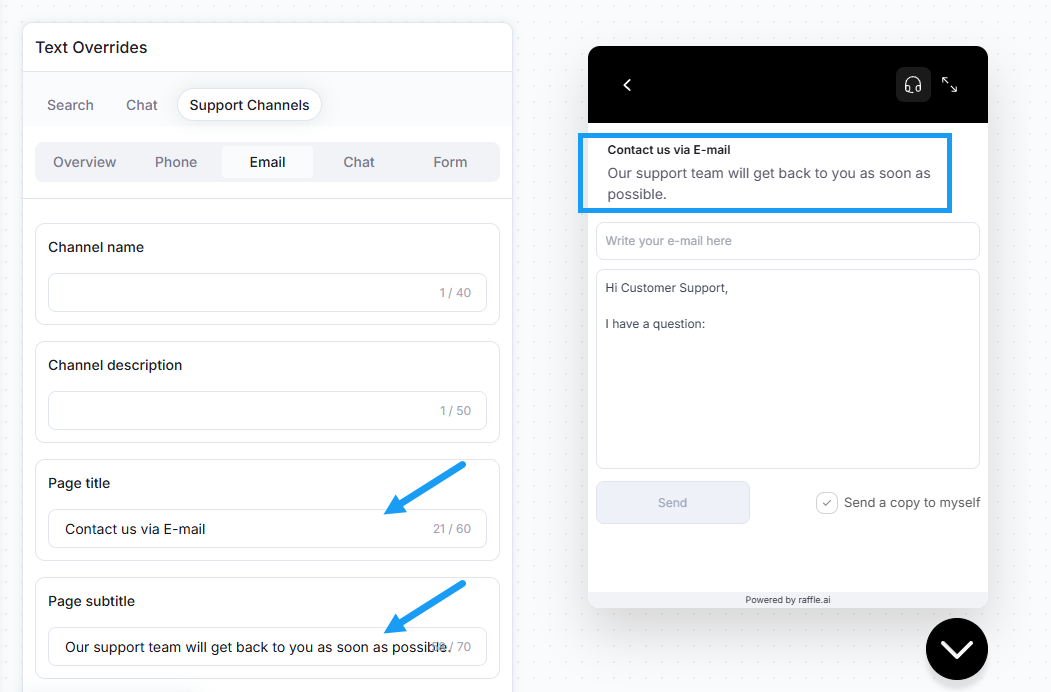
E-mail Support Page Title and Subtitle with Preview
Placeholder for Users E-mail
When the user sends a request to support via email, they need to enter their email address. The placeholder for the senders email can be updated through these steps
-
Go to the Customer Support tab, in the Text Overrides section
-
Go to Email
-
Click the Email address placeholder text field and enter your placeholder
-
Click Save Changes
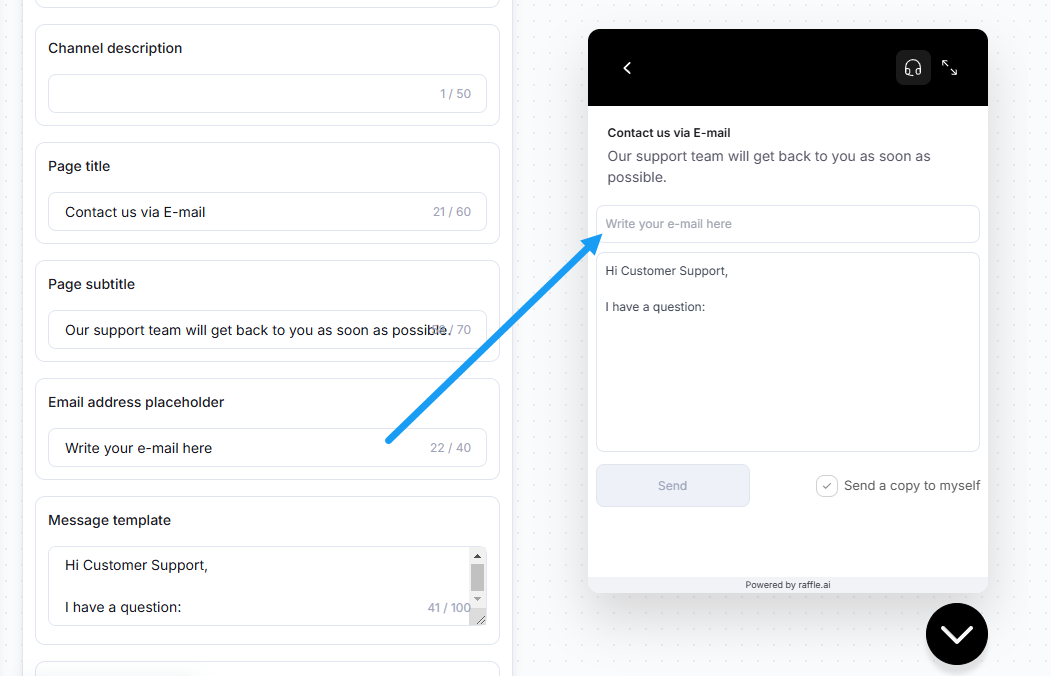
Placeholder for Users E-mail with Preview
Message Template for E-mail Support
You can add or alter a message template for an e-mail to the support team. This can for example help nudge users to phrase questions a certain way or adjust the tone of their query. The user can always erase the template and send a message without it.
-
Go to the Customer Support tab, in the Text Overrides section
-
Go to Email
-
Click the Message template text field and enter a message
-
Click Save Changes
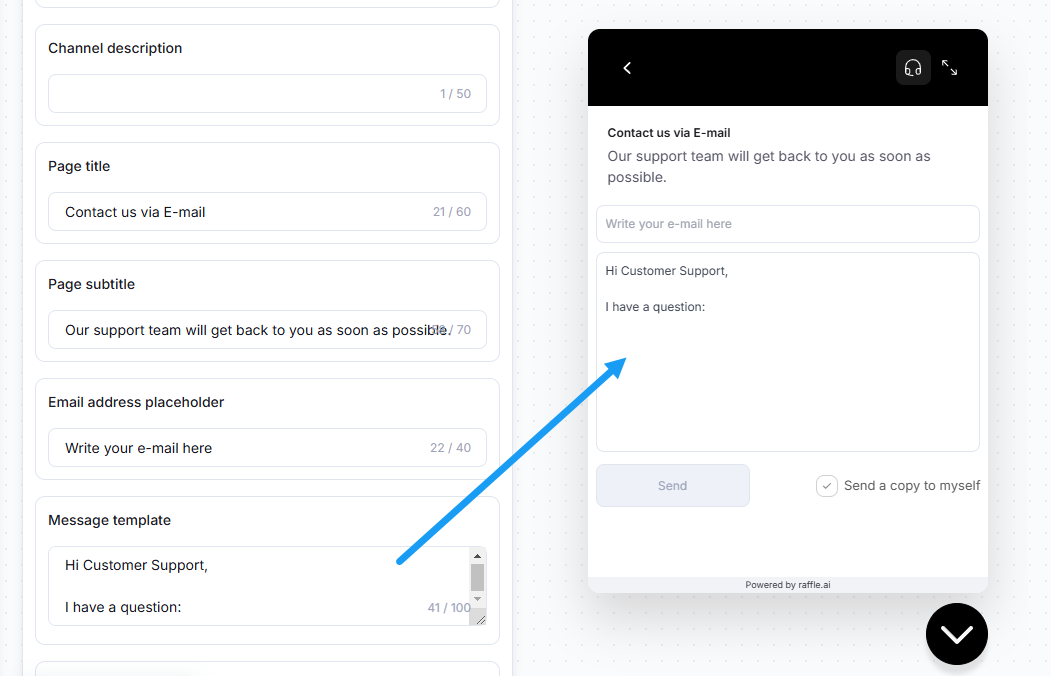
E-mail Message Template with Preview
Success Page
When the user has succeeded in sending an e-mail, they’ll be sent to a success page and get confirmation that the message is sent. You can modify the title and message that provide the success feedback as well as the
-
Go to the Customer Support tab, in the Text Overrides section
-
Go to Email
-
Click the Success page title, the Success page subtitle, and the Success page button texts text fields one at a time to enter the messages that match your company
-
Click Save Changes
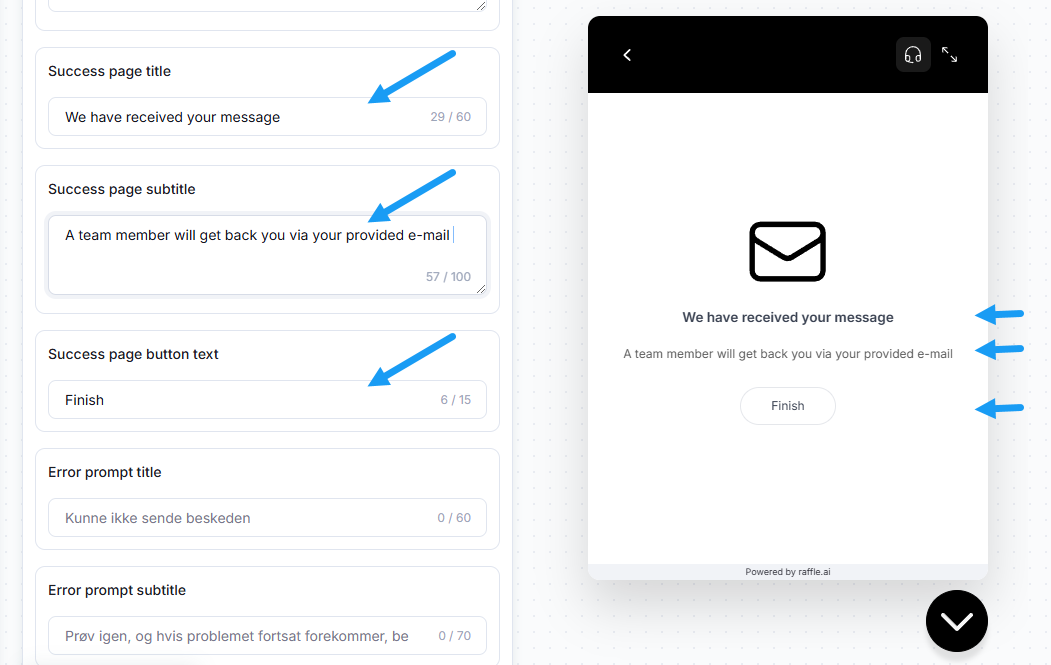
Success Page with Preview
Error Message
If the user tried to send an e-mail to support but an error occurred, then an error prompt will pop up to notify the user. Yhe instructions on how to proceed can be adjusted by updating the title and subtitle of the prompt
-
Go to the Customer Support tab, in the Text Overrides section
-
Go to Email
-
Click the Error prompt title and the Error prompt subtitle text fields one at a time to alter the alert prompt
-
Click Save Changes
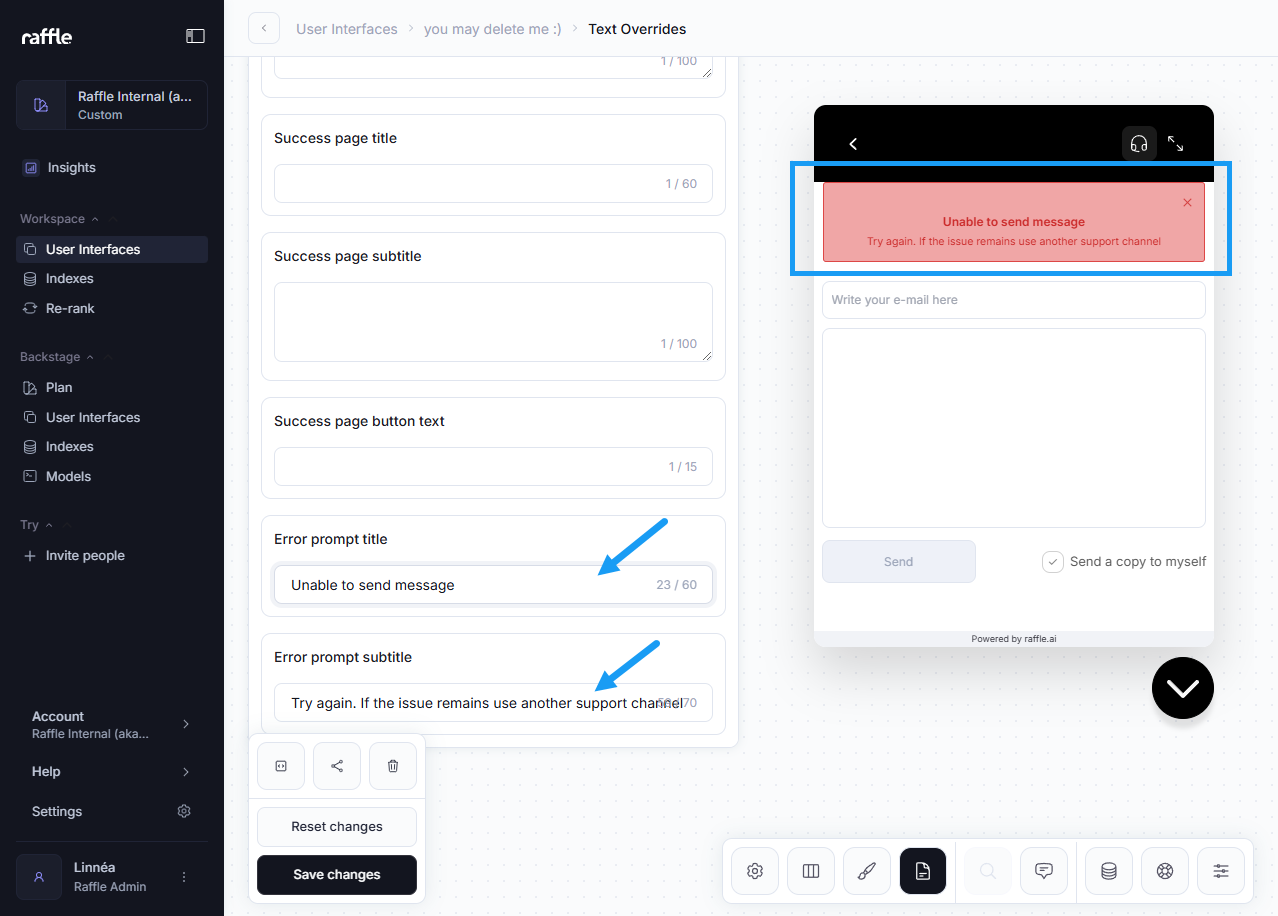
Error Message with Preview
Chat
Chat Channel Element Name and Description
When multiple support channels are enabled and the user goes to the support menu, they can see the Chat option. The title and description of this element can be changed with a simple override
-
Go to the Customer Support tab, in the Text Overrides section
-
Go to Email
-
Click the text fields of Channel name and enter your title label
-
Click the Channel description text fields to enter your description
-
Click Save Changes
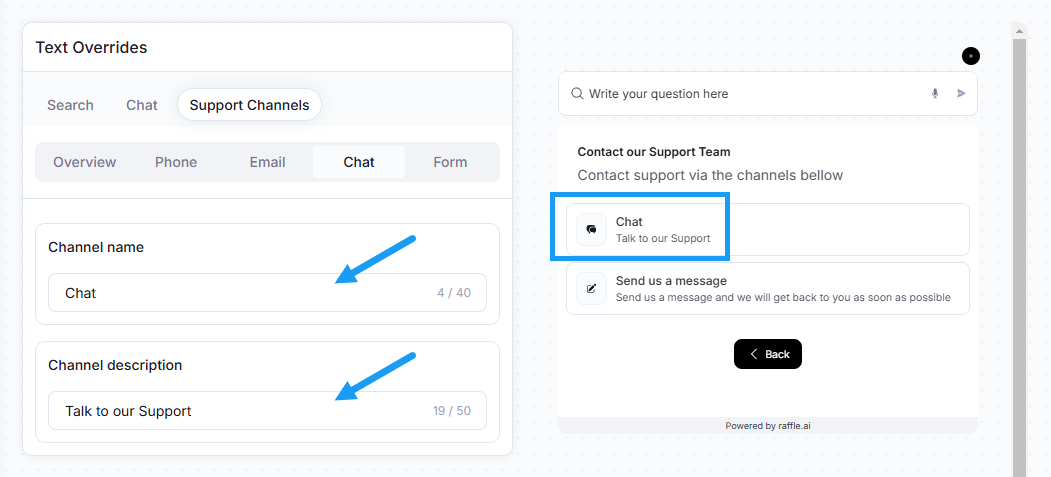
Chat Channel Element Name and Description with Preview
Form
Form Channel Element Name and Description
When multiple support channels are enabled and the user goes to the support menu, they can see the Form option. The title and description of this element can be changed with a simple override
-
Go to the Customer Support tab, in the Text Overrides section
-
Go to Form
-
Click the text fields of Channel name and enter your title label
-
Click the Channel description text fields to enter your description
-
Click Save Changes
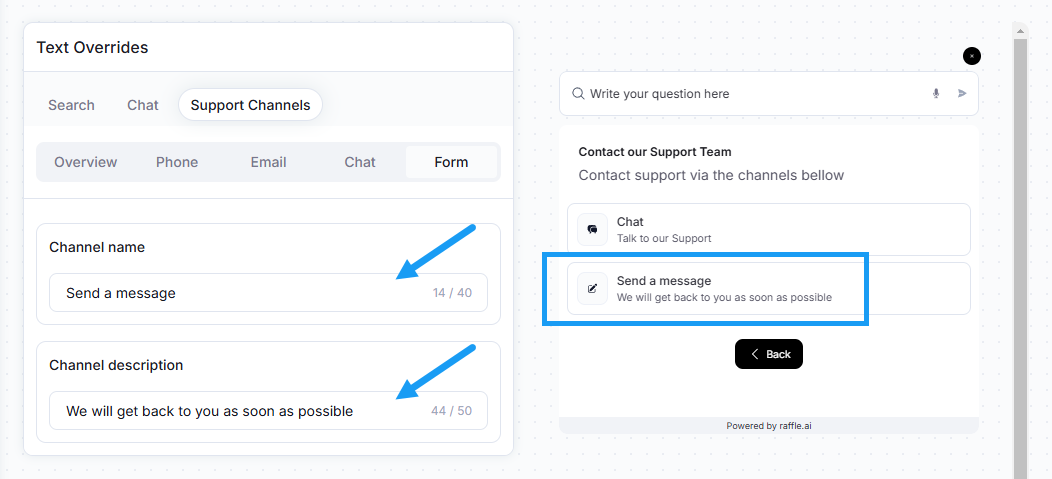
Form Channel Element Name and Description with Preview